For every simple crossing there are many difficult and downright ugly ones.
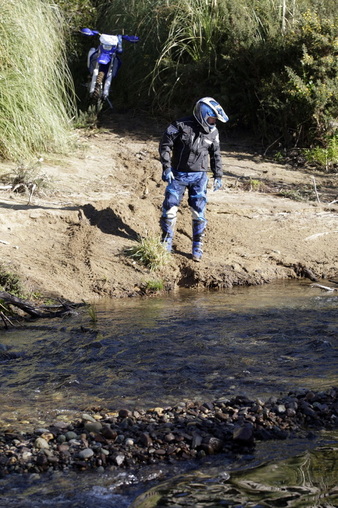
We have seen it in countless images: a trail rider splashes through an ankle deep rocky creek, crystal clear mountain water sparkles in the sunlight, the sun shines out of a blue sky, mountains tower all around. The reality however is that rocky river crossings are not all as friendly as the one described above. For every simple crossing there are many difficult and downright ugly ones. Here are some practical strategies to deal to them.
MAKE A PLAN
Before crossing any river we need to make a plan. Even if you rode the river a month ago take a fresh look, they do change very quickly. Check out the situation upstream and down for the best place to cross. If necessary get off the bike, wade in and check the depth and the make up of the bottom. Ideally you are looking for a wide area of shallow water tinkling over small stones. Generally where a rocky river widens and tips over a shingle bar, it is shallowest, with less current on the upstream side of this bar. Beware however - you are not looking for just any wide section, as the river can also scour out deep holes, especially on a bend. The water in this case will be still and dark looking. Shingle or small stones will give a smooth surface and reasonable footing. Look also for your best entry and exit points, can you easily get up and down the banks?
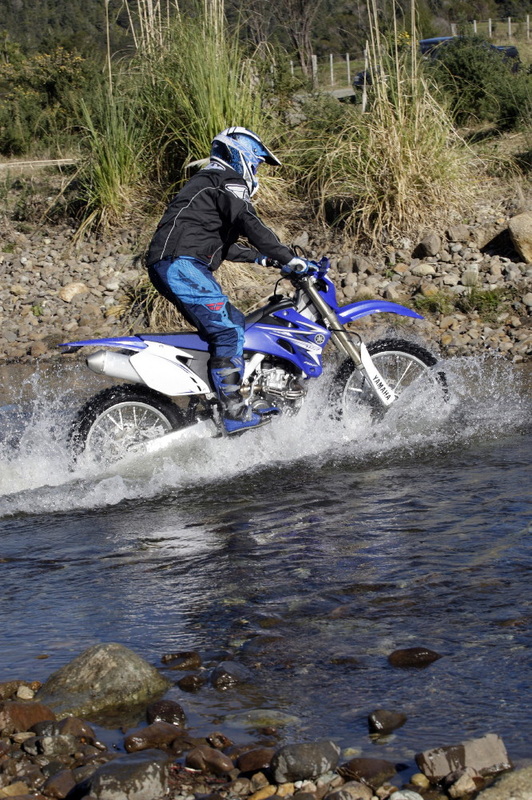
Use the right technique for the crossing and your stature
SHALLOW CROSSINGS
How we tackle a rocky river will depend on how deep and wide the river is, how fast it is flowing and what the underwater surface is like. For trail riders I count shallow rivers as anything under 200-250 mm deep, or well below the crankcase level. Even at this level however there’s a good chance that if you drop the bike, water will get into the airbox and drown the engine. You can then count on at least 30 minutes to dry the engine, assuming of course you have the right tools. There are three basic techniques for shallow crossings - which method you use will depend on conditions and to a certain extent on how tall you are.
A. SHALLOW SMOOTH CROSSING
1. Sitting technique: Using first gear, sit well into the seat, stick out both legs and slip the clutch and leg your way through. Keep engine revs down and keep the clutch slipping slightly. This technique works well for tall riders over almost any stony surface. Short riders are at a big disadvantage using this technique (especially if the bottom is rough or slippery) for if their legs aren’t long enough to touch they now have the major disadvantage of being unable to reach the ground and prop the bike upright as it tips.
2. Standing technique: Very stylish and works equally for short or tall riders. Enter the water as above, but ride through feet up, standing on the pegs and staying as relaxed as possible. Pick the smoothest direct line you can and look well ahead to your exit point.
3. Wheelie technique: This method has spectacular downsides including, drowning your engine, blowing a gasket, or bending a conrod, but it is popular with spectators.
B. SHALLOW BOULDERY CROSSING
1. Sitting technique; Tall riders may treat this crossing as for the smooth crossing above, just get those long legs pumping.
2. Standing technique: Short riders are on a hiding to nothing now. If you have good trials balance skills you may be able to ride boulders feet up, but it’s a higher risk method.
3. Walking technique: For short riders especially walking the bike through reduces risk to almost zero. Hop off the bike on the upstream side (see also deeper crossings below) and push the bike through in first gear. Keep slipping the clutch to control speed and make sure the rear wheel is driving, though not spinning. Lean the bike into your thigh for support. Done properly this technique is seldom slower than riding through and is used by most shorter expert enduro racers.
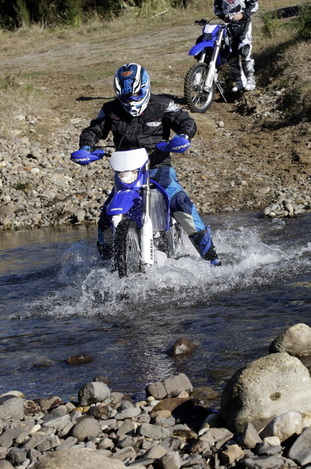
DEEPER CROSSINGS
A well set up trail bike can cross still water almost to the bottom of the seat. However add even moderate current and at somewhere around 300 mm deep and above, water will wash against your crankcase and sidecovers, adding greatly to the tipping force.
Strong current and a slippery, or uneven bottom and current increases difficulty and risk immensely. Don’t underestimate how huge a difference the extra pressure can make. The level is now at or over knee deep and a strong person may be struggling to stand. Once down the bike will certainly fill with water and the rider may not recover their footing. If a river is flowing fast, or dirty near to or above crankcase level, it’s time to strongly consider why you are risking your life.
1.Cross at an angle: Lessen the effect of any current by crossing at an angle of about 30 degrees to the current, preferably downstream.
2. Walk through: Definitely get off and walk your bike slowly through in first gear, leaning the bike towards you for support and take small steps. Stand on the upstream side of your bike, so that if it is pushed down you aren’t trapped under it.
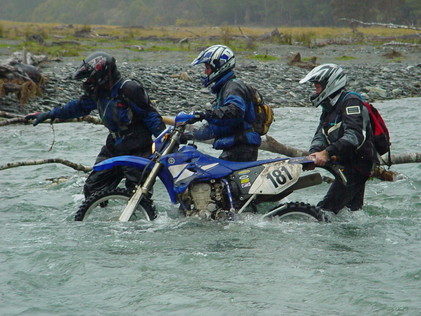
4. Team up: Work as a team of two to four riders on one bike, it’s far easier and safer.
5. Don’t be a dick: Don’t be the hero who tries to ride through alone, only to drop his bike and then make the whole team wait an hour to dry out the engine.
How we tackle a rocky river will depend on how deep and wide the river is, how fast it is flowing and what the underwater surface is like. For trail riders I count shallow rivers as anything under 200-250 mm deep, or well below the crankcase level. Even at this level however there’s a good chance that if you drop the bike, water will get into the airbox and drown the engine. You can then count on at least 30 minutes to dry the engine, assuming of course you have the right tools. There are three basic techniques for shallow crossings - which method you use will depend on conditions and to a certain extent on how tall you are.
A. SHALLOW SMOOTH CROSSING
1. Sitting technique: Using first gear, sit well into the seat, stick out both legs and slip the clutch and leg your way through. Keep engine revs down and keep the clutch slipping slightly. This technique works well for tall riders over almost any stony surface. Short riders are at a big disadvantage using this technique (especially if the bottom is rough or slippery) for if their legs aren’t long enough to touch they now have the major disadvantage of being unable to reach the ground and prop the bike upright as it tips.
2. Standing technique: Very stylish and works equally for short or tall riders. Enter the water as above, but ride through feet up, standing on the pegs and staying as relaxed as possible. Pick the smoothest direct line you can and look well ahead to your exit point.
3. Wheelie technique: This method has spectacular downsides including, drowning your engine, blowing a gasket, or bending a conrod, but it is popular with spectators.
B. SHALLOW BOULDERY CROSSING
1. Sitting technique; Tall riders may treat this crossing as for the smooth crossing above, just get those long legs pumping.
2. Standing technique: Short riders are on a hiding to nothing now. If you have good trials balance skills you may be able to ride boulders feet up, but it’s a higher risk method.
3. Walking technique: For short riders especially walking the bike through reduces risk to almost zero. Hop off the bike on the upstream side (see also deeper crossings below) and push the bike through in first gear. Keep slipping the clutch to control speed and make sure the rear wheel is driving, though not spinning. Lean the bike into your thigh for support. Done properly this technique is seldom slower than riding through and is used by most shorter expert enduro racers.
DEEPER CROSSINGS
A well set up trail bike can cross still water almost to the bottom of the seat. However add even moderate current and at somewhere around 300 mm deep and above, water will wash against your crankcase and sidecovers, adding greatly to the tipping force.
Strong current and a slippery, or uneven bottom and current increases difficulty and risk immensely. Don’t underestimate how huge a difference the extra pressure can make. The level is now at or over knee deep and a strong person may be struggling to stand. Once down the bike will certainly fill with water and the rider may not recover their footing. If a river is flowing fast, or dirty near to or above crankcase level, it’s time to strongly consider why you are risking your life.
1.Cross at an angle: Lessen the effect of any current by crossing at an angle of about 30 degrees to the current, preferably downstream.
2. Walk through: Definitely get off and walk your bike slowly through in first gear, leaning the bike towards you for support and take small steps. Stand on the upstream side of your bike, so that if it is pushed down you aren’t trapped under it.
4. Team up: Work as a team of two to four riders on one bike, it’s far easier and safer.
5. Don’t be a dick: Don’t be the hero who tries to ride through alone, only to drop his bike and then make the whole team wait an hour to dry out the engine.
Lean the bike slightly towards you and in moving water stand on the UPSTREAM side of the bike.
WHY UPSTREAM?
In any deep current I am a strong advocate of standing on the upstream side of the bike. You may read magazine articles where the writer will advise standing on the downstream side in order to hold the bike back against the current. IT CAN BE DANGEROUS TO DO THIS IN FAST-FLOWING DEEP WATER!
In all my experience of racing enduros, trail riding and many years of professional tour guiding, including demanding South Island river environments, standing on the down stream side of the bike in a strong current any more than mid calf depth is DANGEROUS!
The reason is simply this - if you loose your footing (which is highly likely) the water pressure can push the bike down onto you, trapping you under the bike. I know this because I have seen it happen - and I have seen how helpless a rider is pinned by a bike under fast-flowing water. We have had to jump in and pull a helpless rider out - and this took all my, and a second rescuer's strength to do so. The rider under the bike was drowning!
Consider this scenario...............
PINNED DOWN UNDER WATER
ENCUMBERED BY RIDING GEAR
TRAPPED BY BODY ARMOUR PROJECTIONS, OR PACK
YOUR FOOTING HAMPERED BY UNBENDING SLICK-SOLED MX BOOTS.
If you stand on the upstream side of the bike you can lean the bike towards you for support and if you can't hand onto the bike you can just let the bloody thing go.
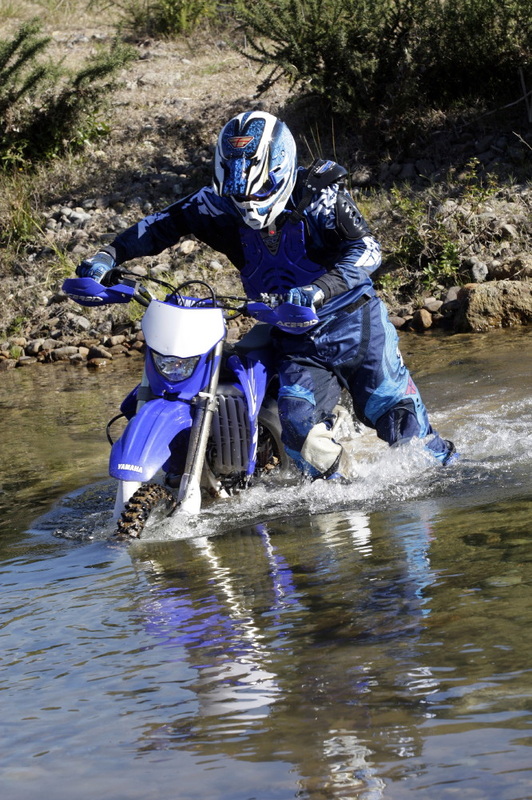
Extreme conditions
Conditions here were at the Glenroy River became quickly marginal after sudden rain.
Heavy rain can make rivers rise quickly, so quickly in fact that it is not unknown for a wall of water several metres high to sweep down. It doesn’t even have to be raining hard where you are, a cloudburst many kilometers away can cause a flood. Crossing dirty, rising or fast-flowing is very risky. Walking the bike through with two, preferably three riders to a bike is safer, but should you really be doing this? Every year rivers take out trampers and hunters. Water pressure is a terribly strong force, and halfway across a river is no place to discover how strong that force can be.
SHOULD I BE HERE CHECKLIST?
Is the water flowing strongly?
Is the water more than 250 mm deep?
Is the water clear?
Is the bottom smooth?
Why am I doing this?
SHOULD I BE HERE CHECKLIST?
Is the water flowing strongly?
Is the water more than 250 mm deep?
Is the water clear?
Is the bottom smooth?
Why am I doing this?